Perfect for vegetarians, other vegetable risotto dishes can be prepared in the same way. Instead of asparagus, use vegetables that, when slightly overcooked, dissolve leaving a creaminess ideal for risotto: broccoli, spinach, artichokes, marrow, courgettes, cauliflower. With some you can hold back a few choice pieces to decorate the cooked dish, just as asparagus tips are used for here. To enhance the flavour of the rice, recycle the vegetable cooking water.
500g (1 lb 2 oz) fresh green asparagus (weighed after cleaning and trimming)
1.7 litres (3 pints) water (for cooking asparagus and for risotto)
1 small onion, thinly sliced
55g (2 oz) butter
350g (12 oz) risotto rice
55g (2 oz) Parmesan, freshly grated
Salt and pepper to taste
Instructions
Wash and peel the asparagus and cut away 3cm (1 1/4 inch) or so of the hard white stalk at the bottom (use this and the skin to add flavour to the cooking water). Cut off about 5cm (2 in) of the tips and set them aside (as they are tender, they will need less cooking), and keep them intact for garnish. Boil the asparagus stalks with the trimmings in the water for 8-10 minutes, depending on the thickness. When they are half cooked, add the tips. When they are fully cooked, strain the stock and keep it simmering. Separate out the asparagus tips and stalks and trimmings. Set the tips aside for garnish, and chop the stalks finely. Discard the trimmings.
Fry the onion in half the butter, then add the chopped asparagus and toss it for a couple of minutes. Now add the rice and proceed as for the basic risotto method, adding the hot broth until the rice is al dente and creamy, but not too stodgy. Remove from the heat and wait for minute or two, then stir in the remaining butter, some salt and pepper, and the grated Parmesan. Serve in bowls, decorated with the asparagus tips.
If you just got a new refrigerator and you’re curious about how long you should wait before putting your food in it, you’re in the right place. We’re here to walk you through everything there is to know about using your new fridge the right way and avoiding any risks!
When to put food in your fridge may sound like a trivial and unimportant thing, but we assure you it is not. If this is your first time purchasing a fridge and you think that placing your food in it right away is okay, we’re here to tell you that it’s not.
You have to be careful with the way you do this if you don’t want to experience issues, such as your expensive groceries going bad and similar. Luckily, you don’t have to struggle or spend hours trying to figure out how to do this.
We provide you with a short and user-friendly guide that will tell you everything you need to know about how to use your new fridge the right way! Let’s not waste any more time and hop right into it.
How Long Should I Wait To Load My Fridge With Food?
The exact answer to this question depends on a variety of factors, including brand, quality, features, and more. However, there is a general recommendation that you can follow when it comes to the wait time for this.
Before loading your groceries into your new refrigerator, you should typically wait for around 2 to 24 hours.
The reason why it’s recommended to wait is that your new fridge will take some time to start operating properly. It needs time to reach maximum functionality, as well as an accurate internal temperature so that it can cool water and produce the first batch of ice.
If you’re wondering what an ideal temperature for your fridge should be, that really depends on the brand in question.
40 °F or below is considered to be an optimum temperature, but your fridge may work differently, so you should check with the manufacturer in case you aren’t sure.
What Happens If I Put Food in My Fridge Right Away?
There are a few risks related to you putting your food in the fridge before it starts working properly and reaching the desired temperature.
For example, if you put warm food in your fridge, it will probably be sitting in the temperature danger zone for a while, which will result in it going bad.
On the other hand, if you put cold food from one fridge into your new one before 2-24 hours pass, the new fridge won’t be able to keep it cool and, again, it will go bad.
The risk is especially high when it comes to frozen foods. These foods must be kept at very cool places, such as your freezer, and not keeping them in a cool enough place will not only result in the foods getting spoiled, but you will also have an enormous mess to clean once they thaw.
How Long Should I Wait Before Plugging My Fridge In?
Another thing you should keep in mind is that your new fridge shouldn’t be plugged in right away either.
Waiting to plug your fridge in and waiting to put food into it may sound like a waste of time, but if you want it to function properly and not experience any issues, you should follow the protocol.
The reason why you should wait is that your fridge gets jostled around during transportation, so the compressor and oil that the compressor needs to function properly get jostled around as well.
Your fridge will need some time for the oil to settle and get into the right position that will allow it to work as well as it should. This usually takes around 2 hours if your fridge was transported in a straight position or 4 hours if it wasn’t.
A Summarized Guide on What To Do Before Putting Food in Your New Fridge
To make matters easier, we provide you with a summarized guide on what steps you should follow to start using your new fridge the right way. Take a look at the list below to find out what to do before loading your fridge:
1. Clean It
The first thing you should do is clean your fridge. You may think that the fridge is already clean since it is brand new, but that doesn’t necessarily have to be the case.
There are certain chemicals used by manufacturers when packing the fridge and transporting it, and they could be harmful and toxic when mixed with your food. That is why you should use soapy water to thoroughly clean your new refrigerator before using it.
2. Plug It In
Now that you have your fridge clean and ready to go, it’s time to plug it in. Remember that you must wait for 2 to 4 hours before doing so.
3. Check the Temperature
The final step before loading your food is to check the temperature. You need to make sure that your fridge reaches 40 °F or below before you put your groceries into it, so keep checking until you see the desired temperature.
4. Load It
Once you see that your fridge reached the desired temperature, you can load your food into it. Organize your produce and other items however you want to, but make sure that your frozen foods go into the freezer compartment.
Also, note that your freezer should reach the temperature of 0°F to keep your frozen food good.
Conclusion
Organizing your food and loading your fridge can be a fun activity, but you need to make sure that you follow certain guidelines if you want it to work properly.
To avoid any issues related to your food going bad or your fridge working improperly, follow the steps we listed in our guide and you’re golden!
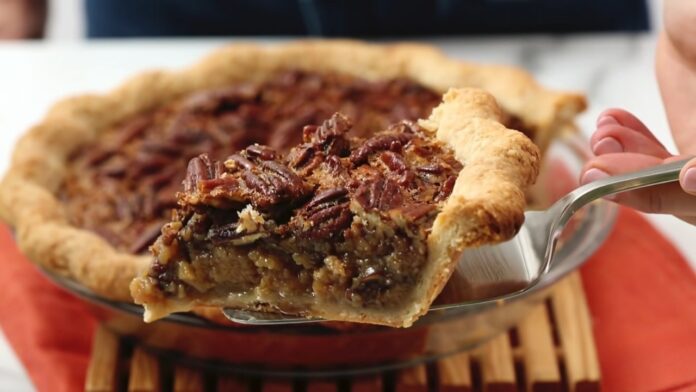
Pecan pie is a cherished tradition, especially during the fall and holiday seasons. This timeless dessert features a rich, nutty filling within a flaky, buttery crust. It’s deeply meaningful to many, symbolizing warmth, family gatherings, and the comfort of homemade meals.
In this blog post, we’ll provide the ultimate guide to the finest pecan pie recipe. Whether you’re an experienced baker or a newcomer to the kitchen, we’ll demystify the process of crafting the ideal pecan pie and share the tips that will elevate your next slice to a delightful homage to tradition.
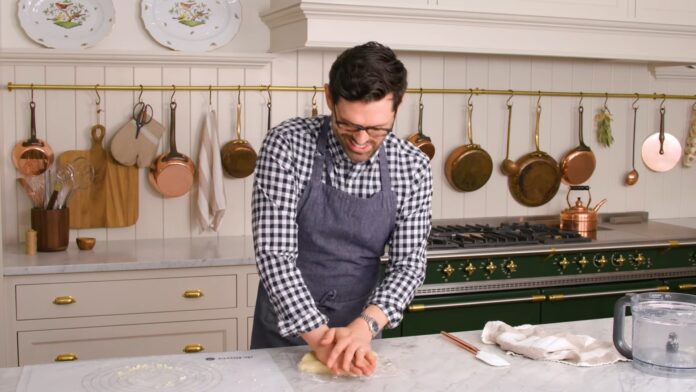
So, don your apron, prepare to carry on the legacy of pecan pie-making, and craft a dessert that not only tastes exceptional but also embodies the warmth and nostalgia of beloved family customs.
Join us in upholding and perfecting this delightful tradition as we delve into the art of baking the perfect pecan pie.
Ingredients
To prepare the best pecan pie, here’s what you’ll need. Following this recipe carefully will lead to a delicious outcome. With the holiday season approaching, you can adjust the recipe to make a pecan pie for your family’s feast:
One nine-inch frozen pie crust, either store-bought or homemade.
1 ½ cups of coarsely chopped pecans, approximately 180 grams. To achieve this, line up your pecans on a cutting board and, using a sharp knife, chop them without lifting the knife.
1 cup of dark corn syrup, roughly 240 mL or 350 grams.
¾ cup of granulated sugar, about 150 grams.
Three large eggs.
4 tablespoons of melted unsalted butter, equivalent to about 57 grams.
2 teaspoons of vanilla extract.
¾ teaspoon of salt.
Assembling Your Pie
Begin by preheating your oven to 425°F (approximately 218°C). Ensure precise measurements by using a measuring cup and scale. Never add ingredients without measuring, as eyeballing can result in overly sweet or thick pecan pie filling.
Place the frozen pie crust on a baking sheet and evenly distribute the chopped pecans to cover the base without overcrowding. Set this aside.
In a medium mixing bowl, combine both your dry and wet ingredients. Whisk together the corn syrup, sugar, eggs, melted butter, vanilla, and salt. Thoroughly mix until the batter is uniform.
Before pouring it over the lined pecans, feel free to decorate the top with more pecans, although leaving it bare is also an option. Prior to adding the batter to the crust, run a spatula through it to ensure all ingredients are well blended.
Bake the pie slowly. For the first 15 minutes, bake at 450°F, and use a timer to precisely lower the temperature to 350°F after this initial period. Continue baking for an additional 35 to 40 minutes until the filling puffs and gently wobbles.
If it remains liquid, bake it a bit longer. If the crust browns too quickly, cover the pie with foil to slow down the cooking process. Let the pie cool completely before slicing.
You can serve this pie according to your preference. Typically, pecan pie is served warm immediately after dinner, but it pairs well with coffee as a treat. Alternatively, serve it with ice cream or whipped cream.
If you choose the latter, add a generous amount to the pie slices before serving. Adjust the size of the pie slices to your liking, but aim for uniform, medium-sized portions.
This recipe is sufficient for a deep dish pie. If you’re using a shallow pan, consider adding an extra ½ cup of pecans to the mixture. If your pie crust is too large, you can opt to make two shallow pies instead of one large one.
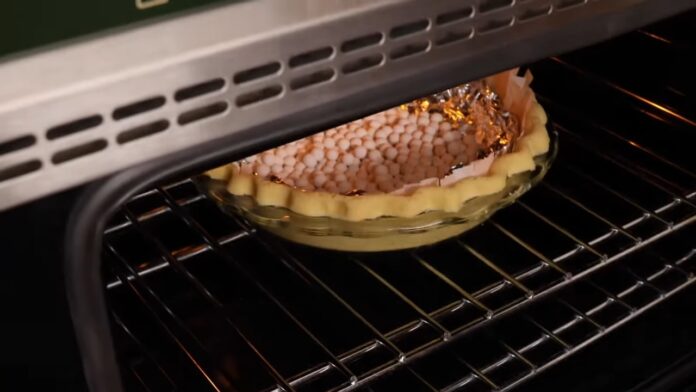
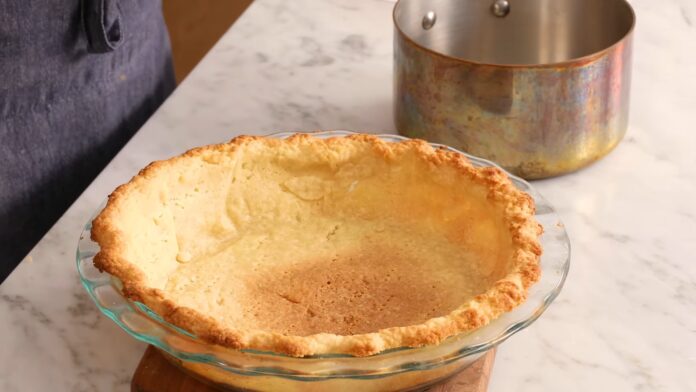
Opt for glass or aluminum bakeware over ceramic. If you’re using ceramic, you’ll need to blind-bake the dough first, as ceramic dishes insulate the pie and may result in undercooked dough.
Once the dough is partially baked, you can fill it with the pecan pie mixture and return it to the oven. Ceramic dishes are also more prone to cracking due to sudden temperature changes. Unless you’re experienced with handling ceramic, stick to glassware.
Be cautious when substituting ingredients. Using salted butter instead of unsalted or light corn syrup instead of dark can alter the batter’s consistency and flavor, potentially leading to a different type of pie.
The Origins of Pecan Pie
The pecan pie boasts a lengthy history. While its exact origin remains somewhat mysterious, it is widely believed to have originated in the southern United States.
Pecans, the key ingredient in the pie, are native to North America and have been enjoyed by indigenous people for centuries. When European settlers arrived, they embraced pecans and likely incorporated them into their cuisine.
Recorded recipes for pecan pie started appearing in cookbooks in the late 19th century, making it a relatively recent addition to the world of desserts. The combination of pecans, sugar, eggs, and butter baked in a flaky pie crust quickly gained popularity in the South.
Traditionally, pecan pie is enjoyed during holidays and special occasions. It’s a staple at Thanksgiving feasts, often served alongside pumpkin and apple pies.
The pie’s sweet, nutty filling and crunchy pecan topping make it a favorite dessert for many, and it’s also a popular choice for family gatherings and potluck dinners throughout the year. Its popularity has extended beyond the South, becoming a beloved treat enjoyed throughout the United States.
Final Thoughts
In conclusion, mastering the art of pecan pie is not just about following a recipe; it’s about understanding the science and technique behind it. Through this guide, we’ve explored the critical elements that make a pecan pie truly exceptional.
From the perfect pie crust to the ideal balance of sweetness and the toasty crunch of pecans, each component plays a crucial role in creating a delectable dessert that will leave your taste buds dancing with delight.
So, the next time you’re looking to impress your family and friends with a memorable dessert, turn to this ultimate guide for reference. Whether it’s a special holiday occasion or a casual gathering, a slice of pecan pie made with love and precision is bound to be the highlight of the meal.
With the right techniques, attention to detail, and a dash of creativity, you’ll be well on your way to pecan pie perfection, creating a dessert that not only fills the room with a warm, inviting aroma but also fills hearts with joy and contentment.
During a holiday in Pantelleria, a small island in the middle of the Mediterranean (between Sicily and Malta), I consumed a mulberry granite every day. Made by a local cook, this helped considerably to cool me down in the intense summer heat. Ripe, scented blackberries can be used in the same way, as indeed can strawberries, raspberries or other soft fruit.
Put the berries in a stainless steel pot over a medium heat and let them burst and release their juices, stirring from time to time. Add the lemon juice and zest, followed by the sugar, and cook for 15 minutes, still stirring. When the sugar has melted, leave the mixture to cool. The berries will have almost dissolved, so there should be no need to strain, but if you are sensitive to texture, you can do so.
To make the granite, take 2-3 tbsp mixture per person and dilute with half its volume of water. Mix well and then place in a suitable container in the freezer. When the mixture starts to set, remove from the freezer and stir well to break up the ice crystals. Return to the freezer. Repeat this process a couple of times, or until the crystals have been completely dispersed and the granite is evenly grainy. Spoon into glasses, decorate with a mint leaf on top, and serve immediately.
What could be simpler than French beans in a salad? It is important to have very fresh beans, without string. The combination of the garlic and mint, along with the oil and lemon, gives a totally unexpected flavour.
350g (12 oz) French beans, topped and tailed, or tender runner beans, trimmed and sliced
1 garlic clove
3 sprigs fresh mint
4tbsp olive oil
Juice of 1 lemon
Salt and pepper to taste
Instructions
Boil the beans in plenty of salted water and cook until quite tender. Drain. Finely chop the garlic and mint. Then mix them in with the oil, lemon juice, salt and pepper and stir into the beans. Mix well and eat hot or cold.
Perhaps more than any other, this recipe reminds me of my youth, as Piedmont is the region where it is most liked and eaten. Some friends and I would go on outings into the mountains or nearby villages, and we would invariably end up in a small inn or cafe for lunch. Here we would devour huge quantities of anchovies in green sauce, served with slices of home-made salami and slices of succulent fresh bread, all washed down with a locally produced Barbera wine. Few meals have remained so clearly in my mind!
The inside of a white bread roll, or 25g (1 oz) fresh breadcrumbs
1 tbsp white wine vinegar
At least 150ml (5fl oz) olive oil
Instructions
For this antipasto, the ideal anchovies would be the salted kind, which need rinsing and filleting first. But you can use fillets canned in oil, provided they are good quality, like the Sicilian ones. Two or three fillets per person would be enough for a starter with fresh bread, perhaps eaten together with other antipasti.
Open the can of anchovies, drain off the oil, and set aside. Finely chop the garlic, parsley and chillies. Soak the bread in the vinegar, squeeze and finely chop. Mix these latter ingredients together.
In a glass jar with a rubber seal, place first a layer of the herb mixture and then a layer of the anchovies; cover with oil and press down. Repeat until the jar is full. Pour some olive oil over the top - the anchovies must be completely covered -and keep in the fridge until required (but no longer than a week, because the oil does not preserve the parsley).
The name of this pudding-cake comes from the Italian word for pine kernel, pinolo (pignolo in Tuscany). Pignolata can be rather dry, so it is often accompanied by a glass of Vin Santo or ‘holy wine’ (so called because it was used by connoisseur priests to celebrate mass). Others say, however, that it originally came from the Greek island Xantos.
375g (13 oz) Italian soft wheat 00 flour or plain flour
1 tsp baking powder or 1 packet Lievito Bertolini Vanigliato (the Italian equivalent)
Instructions
Preheat the oven to 220 C/425 F/Gas 7, and use 25g (1 oz) of the butter to grease a round or square 25cm (10 inch) baking dish.
Beat the remaining butter with the sugar until light. Beat the eggs and yolks with the lemon zest and Vin Santo until light and foamy, then add to the butter and sugar mixture. Very gently fold in the flour, sifted with the baking powder, using a metal spoon. When everything is very well blended, put into the greased baking dish, and scatter the pine kernels on top. Bake in the preheated oven for 35 minutes, then leave to cool. Turn out of the dish when cold.
In Italy, as we know, the clergy treat themselves proverbially well. You will find this recipe on the restaurant menus in Orvieto during May, when wild herbs are available in the fields. It was a challenge for me because the exact ‘mixture’ is apparently a secret. The only known fact is that there should be at least 18 herbs. Gather together as many as you can find, but go easy on the more pungent varieties.
To prepare the sauce, put the herbs in a mortar and pound with the pestle, dribbling in the extra virgin olive oil gradually as you reduce the herbs to a paste. Add the mustard, lemon juice, and salt and pepper to taste; mix well.
Heat the olive oil in a large frying pan, add the veal cutlets and fry for about 6-8 minutes on each side until cooked. Spread the cold herb sauce on top of the cutlets and serve at once.
Embarking on a food tour in Rome is an exhilarating journey that takes you beyond the iconic landmarks and immerses you in the heart and soul of the city’s culinary scene.
Rome, known as the eternal city, is a mecca for food lovers, offering a delectable array of flavors, traditional dishes, and vibrant markets. From indulging in classic Roman cuisine to exploring the diverse influences that have shaped the city’s gastronomy, a food tour in Rome promises to be a feast for the senses.
In this blog post, we will delve into the reasons why you should consider taking a food tour in Rome, the unique qualities that make it the perfect place for such an adventure, and provide valuable tips to help you choose the right food tour that suits your preferences.
Get ready to embark on a gastronomic journey through the streets of Rome, where each bite tells a story and culinary traditions come alive!
Why Take a Food Tour
When visiting a new destination, immersing yourself in the local cuisine is an essential part of the experience. Taking a food tour in Rome not only allows you to taste the flavors of the city but also offers a deeper understanding of its rich culinary scene and history.
Here are several compelling reasons why you should consider a food tour on your next trip to Rome:
A food tour serves as an excellent introduction to the destination. Rome is renowned for its cuisine, and a food tour provides a comprehensive overview of the city’s gastronomy, allowing you to sample a wide variety of dishes and ingredients in just one day!
With an experienced guide leading the way, you can navigate the culinary landscape of Rome with confidence, knowing that you are visiting trusted establishments and tasting dishes that have been carefully selected for their quality and authenticity. That way, you can be sure that your time in the city will be well spent and that you won’t fall into tourist traps. (Rome, like any other big tourist city, has a lot of them!)
One of the highlights of a food tour is the opportunity to interact with local people and establishments genuinely. You can engage in conversations with passionate chefs, friendly vendors, and proud artisans, gaining insights into their culinary traditions and hearing stories that bring the food to life.
Participating in a food tour contributes to the appreciation of regional cuisine. You can learn about the history, techniques, and unique ingredients that make Roman dishes so special. By supporting local establishments and indulging in traditional recipes, you play a part in preserving and promoting the culinary heritage of Rome.
On a food tour, you have the added benefit of receiving extra tips and recommendations from your knowledgeable guide. Whether it’s for the best gelato shop or a hidden trattoria, the guide’s insights can enhance the rest of your trip, ensuring that you have exceptional dining experiences throughout your stay in Rome.
Why Rome is the Perfect Place to Do a Food Tour
Roman cuisine is known for its simplicity and the use of high-quality ingredients.
From classic dishes like carbonara and cacio e pepe to hearty specialties like supplì (fried rice balls) and porchetta (roast pork), Rome offers a mouthwatering array of flavors that reflect the city’s deep-rooted culinary traditions.
Moreover, Rome’s food scene goes beyond traditional Roman cuisine. The city boasts a diverse range of culinary influences, thanks to its history as the capital of an ancient empire and its role as a cultural crossroads.
You can indulge in authentic Neapolitan pizza, sample Sicilian cannoli, or savor dishes from other Italian regions, all within the confines of the Eternal City.
The neighborhoods of Rome also add to its appeal as a food tour destination. From the charming streets of Trastevere, with its bustling trattorias and artisanal gelato shops, to the trendy Testaccio district, known for its authentic Roman street food, each neighborhood offers a distinct culinary experience.
Tips on Choosing the Right Food Tour in Rome
When selecting a food tour in Rome, it’s essential to consider various factors to ensure a memorable and enjoyable experience. Here are some tips to help you choose the right food tour for your preferences:
Check the tour’s food stops and how many they are: Look for a food tour that includes a diverse selection of food stops to provide a comprehensive culinary experience. Ensure that the tour includes a variety of dishes, from appetizers to desserts, showcasing the breadth of Rome’s gastronomy.
Select the neighborhoods you want to visit: Rome is a city of neighborhoods, each with its own unique culinary offerings. Consider which areas you would like to explore and choose a food tour that covers those neighborhoods. Whether it’s the historic centre, Trastevere, or Testaccio, make sure the tour takes you to the areas that interest you most.
Think about the tour duration and start time: Consider your schedule and preferences when selecting the tour duration. Some food tours are a few hours long, while others may span half a day. Additionally, check the start time to ensure it aligns with your availability and desired mealtime.
Look for tours that feature venues frequented by locals: To experience the most authentic and genuine culinary gems of Rome, opt for a food tour that takes you to local establishments, such as secretfoodtours.com. These hidden gems often offer the most authentic flavors and provide an opportunity to interact with passionate locals who take pride in their craft.
Look for tours that feature typical dishes: Rome is famous for its traditional dishes like carbonara, amatriciana, and saltimbocca. Choose a food tour that emphasizes these iconic Roman dishes, as it will provide a true taste of the city’s culinary heritage.
Look for tours that feature regional markets or street fairs: Look for tours that include visits to famous food markets in Rome: For an immersive experience, consider a food tour that takes you to renowned markets such as Campo de’ Fiori or Mercato di Testaccio. These vibrant and bustling locations not only offer an opportunity to taste fresh local produce and artisanal products but also provide insights into the daily lives of Romans and their rich culinary traditions.Wander through the colorful stalls of Campo de’ Fiori, where you can sample ripe fruits, fragrant spices, and authentic Italian cheeses. Explore Mercato di Testaccio, known for its lively atmosphere and a wide array of regional specialties, including fresh seafood, cured meats, and traditional Roman street food. By visiting these iconic markets, you’ll not only have the chance to taste the flavors of Rome but also immerse yourself in the vibrant tapestry of the city’s food culture.
Rome offers an unparalleled food tour experience. So, lace up your walking shoes, bring your appetite, and get ready to savor the flavors of the Eternal City on a food tour in Rome!
For this recipe it is best to use the hind leg of the pig (otherwise known as the ham) with its delicious skin. The skin is cut here to let the fat escape and to enable the meat to absorb all the flavours of the fat and seasonings. And, on top of that, it’s delicious to eat!
Score the skin of the pork with a very sharp knife to make a grid pattern of little squares (your butcher can do this for you). Rub the skin with sea salt and grease on all sides with the olive oil. Place the meat in a baking tray and cook in the preheated oven for 25 minutes.
In the meantime, mix the carrots and garlic with the wine, and season with black pepper.
After roasting the pork for 25 minutes, take it out of the oven and pour over it the carrot, garlic and wine mixture. Don't let the garlic or carrot stick to the skin of the pork, as they will burn. Turn the oven down to 190 C/ 375 F/ Gas 5, replace the roasting pan and cook at this temperature for a further 2 hours. Every now and again baste the pork with the juices in the pan, taking care again not to let the vegetables stick to the skin.
Asparagus Risotto
Perfect for vegetarians, other vegetable risotto dishes can be prepared in the same way. Instead of asparagus, use vegetables that, when slightly overcooked,...
We use cookies to ensure that we give you the best experience on our website. If you continue to use this site we will assume that you are happy with it.Ok


